Mobirise

Soldering is a dangerous activity!
Ensure you are working in a ventilated area with appropriate tools and safety equipment.


Hermit Retro ZXZero Joystick/Controller 5V Power Fix Instructions

  1. Identify the ZXZero Board Version Disconnect power from the ZXZero and remove the board from the casing. Find the version number printed on the upper surface of the ZXZero PCB. This will be beside the Hermit Retro logo. It is likely to be 1.7.0, 1.8.0 or higher. If your board version is 1.7.0 or 1.8.0, you will need to undertake the ZXZero Joystick Power Fix to support powered joysticks including the Hermit Retro ZXController.
  2. Cut a piece of shrouded wire Cut of a piece of shrouded wire approximately 10cm long and trim both ends. Tin both ends with solder.
  3. Solder the wire to a 5V point on the ZXZero board Find a 5V point you are comfortable soldering one end of the wire onto. There are several options as shown in the image below circled in blue
  4. Solder the other end of the wire onto the 5V pin on the backplane board See the backplane diagram below indicating the single attachment point circled in blue
  5. You should now have +5V feeding to your joystick or Hermit Retro ZXController. You can power up the ZXZero and check this with a multimeter prior to putting the board back inside the casing.
ZXZero 5V Points

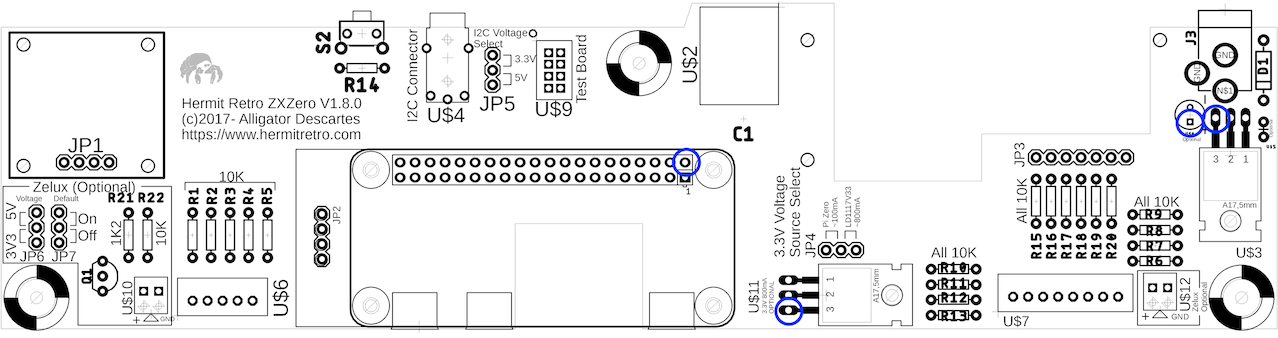
Hermit Retro ZXZero 5V Attachment Points (circled in blue)

Hermit Retro ZXZero Backplane 5V Points

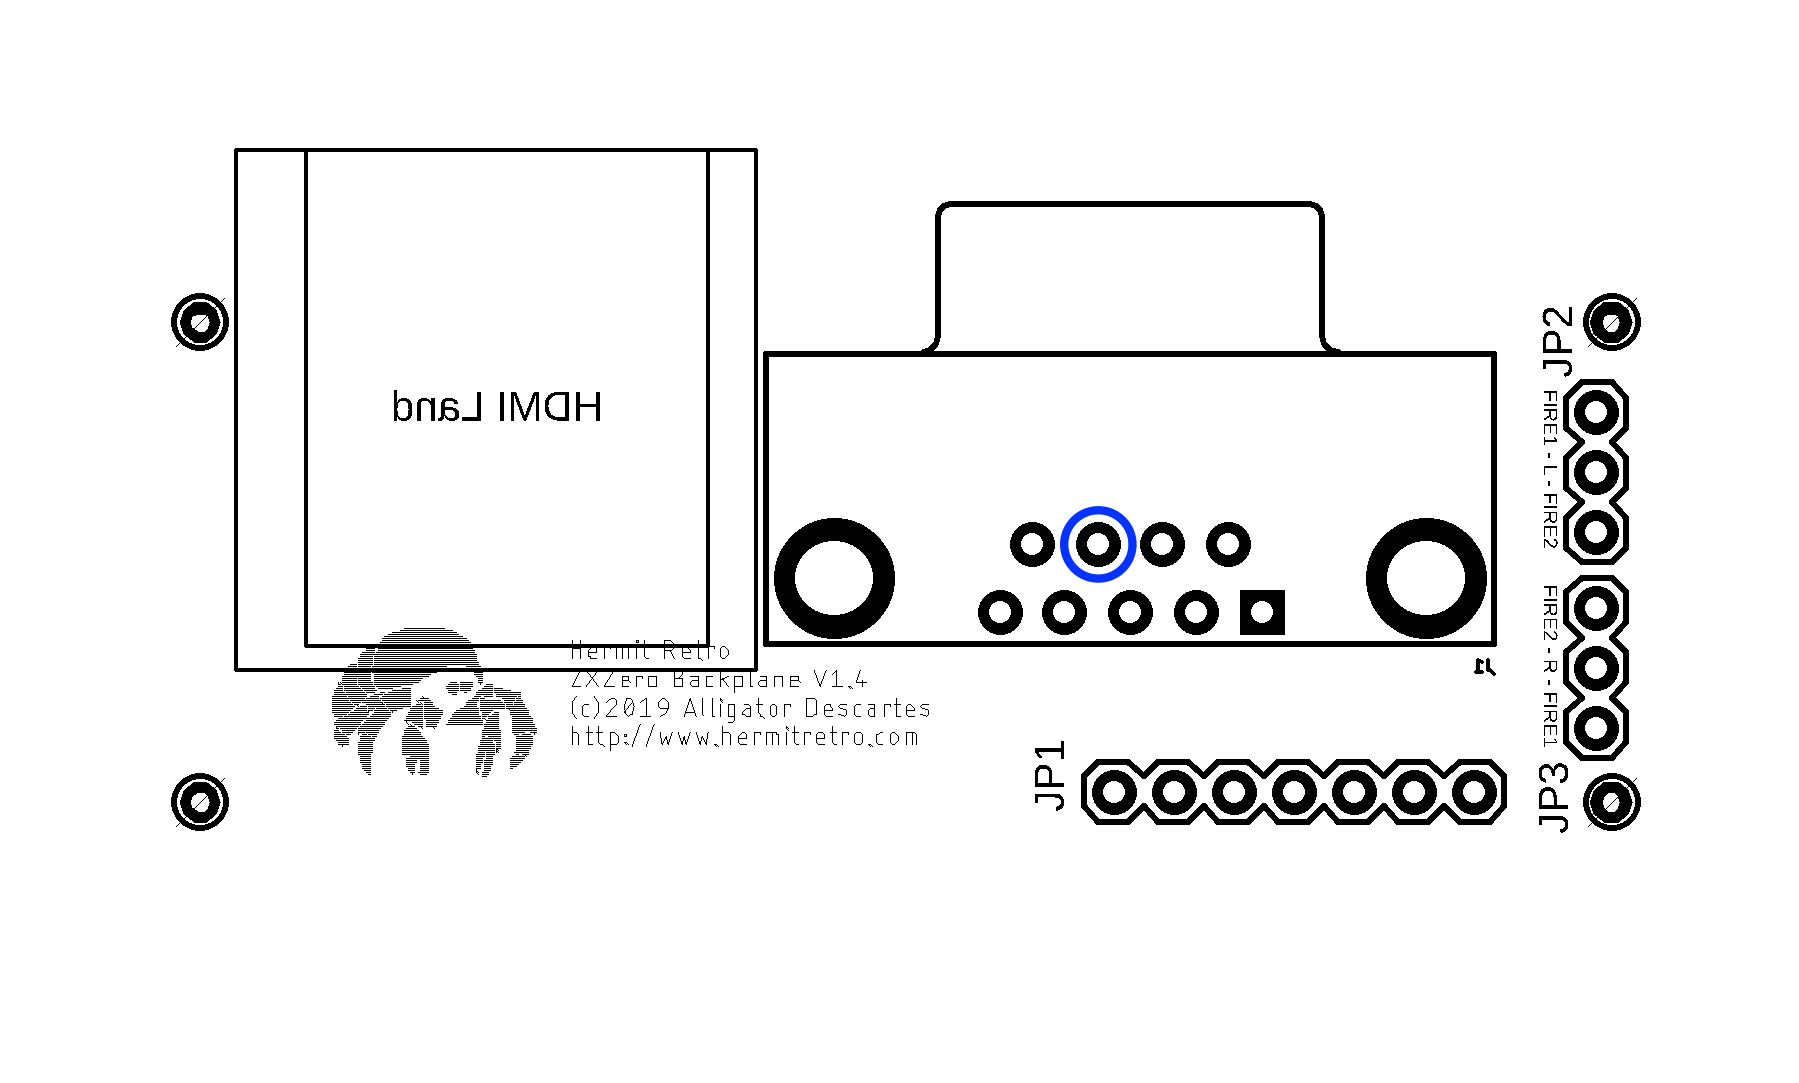
Hermit Retro ZXZero Backplane 5V Attachment Point (circled in blue)

© Copyright 2022 Hermit Retro Products. All Rights Reserved.